


Scented candles tend to magically turn a house into a home. The light flicker of the flame gives a relaxed or romantic tone to the atmosphere, and keeps the space smelling fragrant for hours. The only problem? Wax melts, and the candle becomes worthless after the wax is all gone. So how do you keep the flame going for more than a few hours? Simple, just remove the problematic ingredient—don't use wax!
Beauty guru RachWillss has an easy-to-follow tutorial for making your own no-wax scented candles. Not only will these candles set a mood, they are also beneficial during blackouts. And the best part is that you can customize them with any color you'd like to match your home's decor.
For other fun candle-making projects, check out our guides on making emergency butter candles, corn or potato chip candles, oil lamps using oranges or tuna cans, and cheese wax candles.
What You'll Need
- Vegetable shortening
- Essential oils
- Candle wicks
- Candle holder (you can use old candles, mason jars, etc.)
- Tacky glue
- Crayons (optional, see Step #3 below for no-wax substitutes)

Get the Wicks Ready
Cut the wicks down to size, then glue them to the bottom of the candle holder with tacky glue. You can add multiple wicks, or just stick with one.

Liquify the Shortening
Place the shortening in a pot and put the temperature on low-to-medium heat. Stir the shortening until it melts into a liquid, making sure there are no more clumps left.

Add Your Coloring & Scents
Once your shortening is liquid, you can add any color crayon you'd like. Take the shortening off the heat and cut off a small piece of crayon and drop it in the pot (don't forget to remove any paper from the crayon). Stir the crayon until it's fully melted, then add in the essential oils as you stir the mixture.

A Quick Note About Crayons vs. Non-Wax Coloring
The candles shown here aren't technically 100% wax-free because of the crayons used. If you don't want any wax at all in your DIY candles, then just skip the crayons. They're only used here for coloring; it adds a personal touch and doesn't affect how long the candle will burn for. You could also use wax melts, oil pastels, etc. for wax-based coloring.
If you want to color your candles a different way, try oil-based candy coloring or another product that's oil soluble. Just stay away from water soluble things like regular food coloring and soap-making liquid dyes, which will just clump up into little beads in the liquid vegetable shortening.
Stir, Stiffen, & Make Your Candle
Keep stirring the essential oils and color so that they don't separate. Stir until the mixture begins to thicken and solidify—a stiffer mixture helps to keep the wick standing upright. Once it starts to harden, pour the shortening into your candle holder and smooth it out.

Now give it a little time to set, and you're all done.
The (Lazier) Alternative Method
If you find yourself being lazy, you can always stick the shortening in the microwave to heat it up. Fill the container with the shortening, heat it up for 20 seconds, stir it, and add more shortening until it's at your desired height. Add the color and oils, and as it begins to solidify, add your wick.


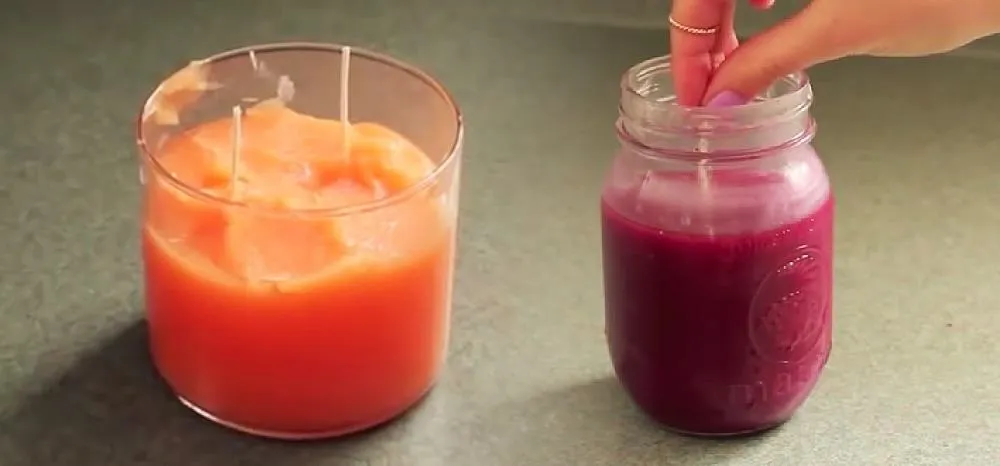
Either way, your finished products will look and smell great.

You can use any kind of container, color, or scent that you'd like. Your candle will be burning bright for a long time, so make sure you like it! If you don't, just make more!


Comments
Be the first, drop a comment!